Ice and Water Shield: Where to Install and Why
Ice and Water Shield: Where to Install It and Why It Matters
If you live anywhere that gets heavy rain, snow, or freezing temperatures, your roof needs more than just shingles and standard underlayment. It needs ice and water shield.
This self adhesive membrane is one of the most effective ways to prevent leaks in the areas of your roof that are most vulnerable to water damage. Yet many homeowners and even some contractors underestimate where it should go and why it is so important.
In this guide, we will explain what ice and water shield is, where it needs to be installed, how it works against ice dams and wind driven rain, and when it makes sense to use it on your next roofing project.
What Is Ice and Water Shield?
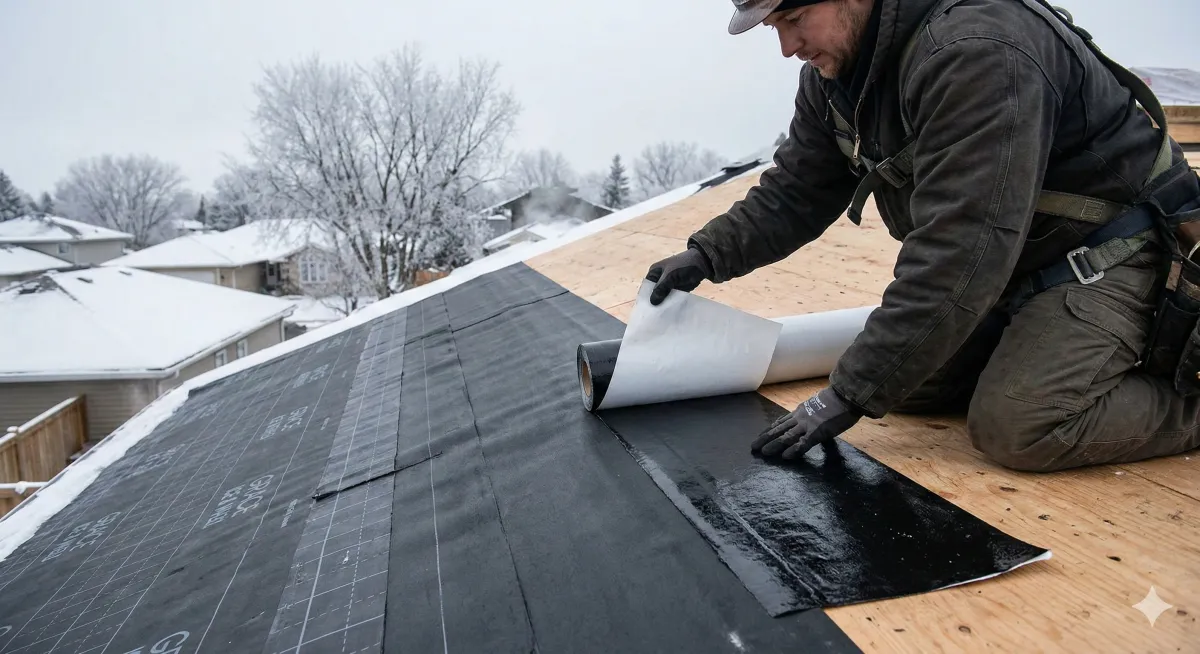
Ice and water shield is a self adhesive roofing underlayment made from rubberized asphalt. It comes in rolls and has a sticky backing protected by a release film that you peel off during installation. Once applied to the roof deck, it bonds tightly to the wood and creates a fully waterproof seal.
What makes it different from standard underlayment is how it handles fasteners. When nails or staples go through the membrane, the rubberized asphalt seals around the shaft of each fastener. That means even where the material is punctured during shingle installation, water cannot get through.
Standard synthetic or felt underlayment is water resistant, meaning it will shed water that hits its surface. But ice and water shield is fully waterproof, meaning it can handle standing water and moisture that backs up from below without letting anything through.
This makes it the go to product for any area of the roof where water is most likely to collect, pool, or get pushed upward by ice or wind.

Where to Install Ice and Water Shield
You do not need to cover your entire roof with ice and water shield. It is designed for the high risk areas where leaks are most likely to happen. Here is where it should go.
Eaves (Along the Roof Edge)
The eaves are the most common place for ice dams to form. Heat from your attic melts snow on the upper part of the roof. That water runs down to the colder eave area, freezes, and creates a dam of ice. Water then backs up behind that dam and can seep under the shingles.
Most building codes require ice and water shield to extend at least 24 inches past the interior wall line. In colder climates, extending it 3 to 6 feet up from the eave is even better.
Valleys
Roof valleys are where two roof planes meet at an angle. Water from both sides of the roof funnels into the valley, making it one of the highest flow areas on any roof. Even a small gap in the underlayment here can cause a serious leak.
Ice and water shield should run the full length of every valley, extending at least 18 inches on each side of the centerline.
Around Chimneys and Skylights
Any place where something penetrates through the roof deck is a potential leak point. Chimneys, skylights, vent pipes, and other roof penetrations need ice and water shield applied tightly around the base and integrated with the flashing.
Dormers and Wall Intersections
Where a roof plane meets a vertical wall (like around dormers or where an addition connects to the main house), water can collect and run behind the flashing. Ice and water shield provides a sealed backup layer in these areas.
Low Slope Sections
If any section of your roof has a pitch of 4:12 or less, it is considered low slope and is more prone to water pooling. Ice and water shield is strongly recommended (and often required by code) on these sections.

How Ice and Water Shield Protects Against Ice Dams
Ice dams are one of the most common causes of winter roof leaks. Here is how they form and why ice and water shield stops them.
When your attic is warmer than the outside air, heat rises through the roof and melts the snow sitting on top. That melted water flows down toward the eaves, where the roof extends past the exterior wall and is no longer being heated from below. The water refreezes at the cold eave, forming a ridge of ice.
As more snow melts and more ice builds up, water gets trapped behind the dam with nowhere to go. It backs up under the shingles and, without proper protection, soaks into the roof deck.
Ice and water shield stops this process cold. Because it is fully adhered to the deck and seals around every nail, there is no path for the backed up water to reach the wood. Even if water sits on top of the membrane for days, it cannot penetrate through.
This is why building codes in cold climates require ice and water shield at the eaves. It is not optional protection. It is your roof's last line of defense against one of the most damaging winter problems a home can face.

Ice and Water Shield vs. Synthetic Underlayment
Both products serve as a protective layer on the roof deck, but they are designed for different purposes.
Synthetic underlayment is water resistant and covers the main field of the roof. It sheds rain, provides UV protection during construction, and adds tear resistance. It is lighter, easier to install, and more affordable for large areas.
Ice and water shield is waterproof and self sealing. It is thicker, heavier, and costs more per square foot. It is built for the trouble spots where water pools, backs up, or gets driven sideways by wind.
The best roofing systems use both. Ice and water shield goes in the high risk zones (eaves, valleys, penetrations, low slope areas) and synthetic underlayment covers everything else.
At BCP Inc., we supply both types so you can build a complete roofing system that is protected at every level. Our RoofLayer synthetic underlayment handles the field of the roof while ice and water shield takes care of the vulnerable areas.
When Is Ice and Water Shield Required by Code?
Building codes vary by region, but here are the general requirements.
In areas where the average January temperature is 25 degrees Fahrenheit or lower, most codes require ice and water shield at the eaves extending at least 24 inches past the interior wall line. This covers most of the northern United States and all of Canada.
Many codes also require it in valleys and around roof penetrations regardless of climate. Some states like Florida require it across the entire roof deck for hurricane protection.
Always check your local building code before starting a roofing project. Your roofing contractor should know the specific requirements for your area, and using the right products in the right locations ensures you pass inspection and maintain your roofing warranty.
Installation Tips
Installing ice and water shield is straightforward, but there are a few things to get right.
Apply it directly to a clean, dry roof deck. Remove any dust, debris, or old roofing materials before you start. The adhesive needs a clean surface to bond properly.
Start at the eave and work your way up. Each row should overlap the one below it by at least 3 inches on horizontal seams and 6 inches on end laps. Press the membrane firmly into place to remove air bubbles and ensure full contact with the deck.
In cold weather (below 40 degrees Fahrenheit), the adhesive may not bond as well. Some products require a primer on the deck surface in colder conditions. Check the manufacturer's instructions for temperature guidelines.
Do not leave ice and water shield exposed to UV for extended periods. Most products are rated for 30 to 90 days of exposure before they need to be covered with roofing material. Plan your installation timeline accordingly.
Frequently Asked Questions
Can I use ice and water shield on my entire roof? You can, but it is not always necessary and adds significant cost. The standard approach is to use it in high risk areas and cover the rest with synthetic underlayment. If you live in a severe climate with heavy storms or hurricanes, full coverage may be worth the investment.
Is ice and water shield the same as peel and stick underlayment? Yes, "peel and stick" is a common name for self adhesive underlayment products, which includes ice and water shield. The terms are often used interchangeably.
Does ice and water shield go over or under synthetic underlayment? Ice and water shield goes down first, directly on the roof deck. Synthetic underlayment then covers the remaining areas and overlaps the edges of the ice and water shield.
How long does ice and water shield last? When properly installed under roofing material, ice and water shield can last 30 to 40 years or more. It does not dry out, crack, or rot like felt underlayment.
Do I need ice and water shield if I live in a warm climate? Even in warm climates, ice and water shield is valuable in valleys, around penetrations, and on low slope roof sections. Wind driven rain can cause leaks in any climate, and these areas are always the most vulnerable.
Give Your Roof the Protection It Deserves
Ice and water shield is not just a cold climate product. It is a critical part of any well built roofing system. Whether you are protecting against ice dams in the north or wind driven rain in the south, this membrane keeps water out of the areas where your roof is most at risk.
At BCP Inc., we help contractors and homeowners build roofing systems that hold up in the real world. From synthetic underlayment for the main deck to ice and water shield for the trouble spots, we have the products and the knowledge to help you get it right.
Ready to get started? Call us at 877-540-5678 or visit bcpinc.us to explore our full product line and request a quote.
