Radiant Barrier Insulation: How It Works + Install Guide
Radiant Barrier Insulation: Complete Guide to Saving Energy and Staying Cool
Radiant barrier insulation is a reflective aluminum material that blocks radiant heat by reflecting up to 97% of it away from your attic, lowering attic temperatures by 20 to 30°F and cutting cooling costs by 5 to 15% in hot climates. If your upstairs rooms feel like an oven in the summer. If your upstairs rooms feel like an oven in the summer or your air conditioning seems to run nonstop, your attic could be the problem. On a hot day, your roof absorbs solar energy and transfers that heat straight down into the attic. Attic temperatures can reach 150 degrees or higher. That heat radiates through the ceiling and into your living space, making your cooling system work overtime and driving up your energy bills.
Radiant barrier insulation is one of the most effective and affordable ways to fix this problem. In this guide, we will cover how it works, where to install it, how much you can save, and how to choose the right product for your home.
What Is Radiant Barrier Insulation?
Radiant barrier insulation is a reflective material, usually made from aluminum foil laminated onto kraft paper, polyethylene film, or a foam backing. It is installed in the attic to reflect radiant heat away from the living space rather than absorbing it the way traditional insulation does.
While standard insulation like fiberglass or cellulose slows heat transfer through conduction and convection, it does very little to stop radiant heat. Radiant heat is heat that travels in waves from a hot surface (your roof deck) to a cooler surface (your attic floor and everything below it).
Radiant barrier reflects up to 97% of that radiant energy back toward the roof. The result is a significantly cooler attic, lower ceiling temperatures, and less strain on your air conditioning system.
How Does Radiant Barrier Insulation Work?
To understand why radiant barrier is so effective, it helps to know the three types of heat transfer.
Conduction is heat moving through solid materials. When your roof absorbs solar energy, that heat conducts through the shingles and decking to the inside surface.
Convection is heat moving through air. Hot air in the attic rises and circulates, spreading heat throughout the space and eventually pushing it down toward the ceiling below.
Radiation is heat moving in waves from a hot surface to a cooler one without needing direct contact. This is the dominant source of heat gain in your attic. The hot underside of the roof deck radiates heat downward to the attic floor, insulation, ductwork, and eventually into your living space.
Traditional insulation addresses conduction and convection. Radiant barrier addresses radiation. That is why they are not replacements for each other. They work best together, each handling a different type of heat transfer that the other cannot.
When sunlight hits your roof, the shingles and deck heat up. That heat radiates downward into the attic. A radiant barrier installed on the rafters or over the attic insulation reflects that radiant energy back before it can warm the attic air and the surfaces below.
The result is attic temperatures that are 20 to 30 degrees cooler than they would be without the barrier.
Types of Radiant Barrier Insulation
Foil Sheets and Rolls
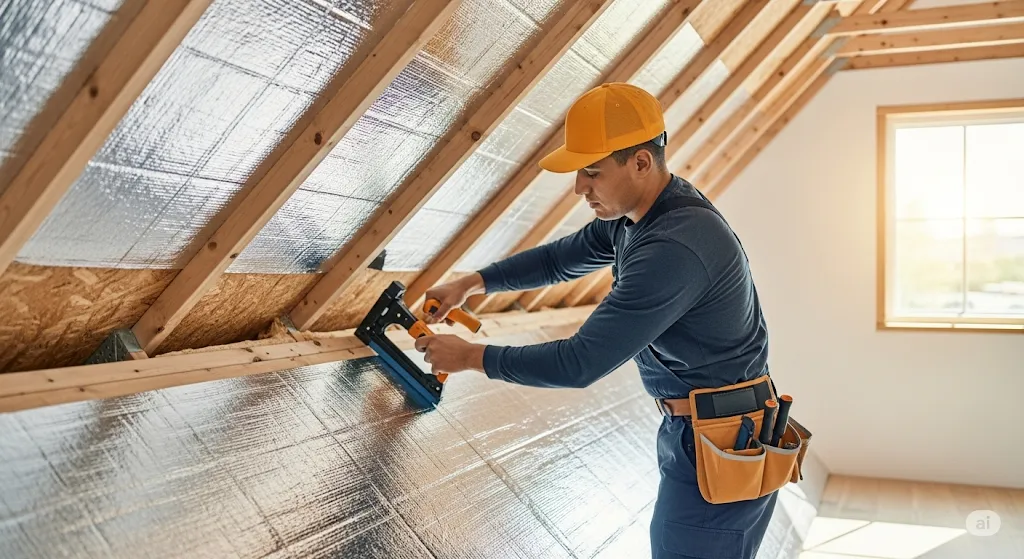
This is the most common and cost effective option. Rolls of reflective foil are stapled to the underside of the roof rafters with the shiny side facing down toward the attic floor. This placement reflects heat before it enters the attic space and works well in both new construction and retrofits.
Foil Faced Panels
Rigid insulation boards with a reflective layer on one or both sides. They combine traditional insulation (R value) with radiant heat reflection in a single product. Commonly used in new construction where they can be installed as part of the roof or wall assembly.
Radiant Barrier Sheathing
Some plywood and OSB roof decking comes with a foil layer already bonded to one side. This is installed as the roof deck during framing, eliminating the need for a separate barrier installation. Best for new builds and full roof replacements.
Spray On Radiant Barriers
Less common, but useful in attics with irregular shapes or hard to reach areas where sheet products are difficult to install. A reflective coating is sprayed directly onto the underside of the roof deck.
For most existing homes, foil rolls stapled to the rafters are the easiest, most affordable, and most effective option.
Where to Install Radiant Barrier
On the underside of the roof rafters is the most effective location. The barrier is stapled to the bottom of each rafter with the reflective side facing down. This reflects heat before it enters the attic space. Leave a small air gap between the barrier and the roof deck. The barrier should not touch the deck directly because it needs an air space to reflect heat effectively.
Over the attic floor insulation is the easiest DIY option. The barrier is laid flat over the existing insulation with the reflective side facing up. This catches heat that has already entered the attic and reflects it back toward the roof. Less effective than rafter installation but still provides meaningful energy savings and is much simpler to install.
Important: Do not block soffit vents, ridge vents, or any other ventilation openings. Proper attic ventilation is essential for the barrier to work correctly and to prevent moisture buildup.
Real Energy Savings
The numbers are encouraging, especially in hot climates.
Homes in southern states typically see a 5 to 15% reduction in cooling costs after installing radiant barrier. In some cases, the savings can be higher, particularly in homes with poor existing insulation, dark colored roofs, or ductwork running through the attic.
The Department of Energy has found that radiant barriers are most effective in hot climates and can reduce cooling costs enough to pay for themselves within 2 to 5 years.
Beyond energy savings, radiant barrier also reduces thermal stress on your HVAC system and ductwork. A cooler attic means your AC runs less, your ducts lose less cooled air to the hot attic space, and both systems last longer. Your roof underlayment also benefits from lower attic temperatures, as extreme heat accelerates material degradation.
In cooler climates, radiant barrier helps in winter by reflecting heat back down into the living space, reducing heat loss through the attic. The winter benefit is less pronounced than the summer benefit, but it adds to the overall return on investment.
Radiant Barrier vs. Traditional Insulation
This is the most common question homeowners ask. The answer is simple: you need both.
Fiberglass and cellulose insulation slow heat transfer through conduction and convection. They trap air in tiny pockets that resist heat flow. The thicker the insulation (measured in R value), the slower the heat moves through it. But they do very little against radiant heat.
Radiant barrier reflects radiant heat before it reaches the insulation. It does not have an R value in the traditional sense because it works by reflection rather than resistance.
The best performing attics use both: standard insulation on the attic floor (R 38 to R 60 depending on your climate zone) plus radiant barrier on the rafters or over the insulation. This combination addresses all three types of heat transfer and delivers the lowest possible energy bills.
How to Choose the Right Radiant Barrier
Climate matters most. Hot, sunny regions see the biggest savings. If you live in the southern half of the United States, radiant barrier is one of the best energy upgrades you can make.
Attic layout. Open attics with accessible rafters are ideal for foil roll installation. Finished attics or those with complex framing may benefit from spray on barriers or foil faced panels.
Material quality. Look for thick, tear resistant foil with proven reflectivity ratings of 95% or higher. Cheap, thin foil tears during installation and sags over time, reducing effectiveness.
Check your existing insulation first. If your current attic insulation is below R 30, add insulation AND radiant barrier rather than barrier alone. The barrier works best when it supplements a well insulated attic.
At BCP Inc., our radiant barrier products are available in foil, breathable, and foam backed options to fit any attic configuration and climate.
Installation Tips
Always install with the reflective side facing the open air space. For rafter installation, the shiny side faces down. For attic floor installation, the shiny side faces up.
Leave all attic vents open. Ridge vents, soffit vents, and gable vents must remain clear. Radiant barrier works with ventilation, not in place of it.
If installing on rafters, leave at least a 1 inch gap between the barrier and the roof deck. Direct contact reduces effectiveness and can trap moisture.
Overlap seams by at least 2 inches and secure with staples or foil tape. Gaps between sheets reduce the overall reflective coverage.
Use proper safety gear in the attic. Wear a dust mask, gloves, and eye protection. Step only on the joists, not on the drywall ceiling below.
Common Mistakes to Avoid
Blocking vents with foil. This traps heat and moisture, causing more problems than it solves. Always keep all ventilation openings clear.
Installing in direct contact with the roof deck. Without an air gap, the barrier cannot reflect heat effectively. It simply conducts heat from the deck through the foil.
Choosing cheap, flimsy foil. Thin foil tears during installation and sags over time. Invest in quality material with high tear strength and proven reflectivity.
Covering the reflective surface with other insulation. If you lay insulation on top of a radiant barrier, you eliminate the reflective benefit. The barrier needs to face an open air space to work.
Assuming radiant barrier replaces insulation. It does not. It supplements insulation by addressing a type of heat transfer that insulation cannot handle. You still need proper insulation in your attic.
Frequently Asked Questions
Is radiant barrier a replacement for regular insulation? No. Radiant barrier and traditional insulation handle different types of heat transfer. You need both for the best performance. Radiant barrier reflects radiant heat while insulation resists conductive and convective heat.
Does radiant barrier help in winter? Yes, but the benefit is smaller than in summer. In winter, radiant barrier reflects heat back down into the living space, reducing heat loss through the attic. The primary benefit is summer cooling, but the winter contribution adds to the overall energy savings.
Can I install radiant barrier myself? Yes, especially with the attic floor method. Rafter installation is more challenging because it involves working overhead in a confined space. If you are comfortable working in your attic, DIY can save significant labor costs.
How much does radiant barrier cost? Material costs for a typical attic run a few hundred to a couple thousand dollars depending on size and product type, and most installations pay for themselves in 2 to 5 years through energy savings. For a full price breakdown by attic size and material, see our radiant barrier cost guide.
Does radiant barrier work under metal roofs? Yes. Metal roofs conduct even more heat than shingle roofs, making radiant barrier particularly effective in metal roof applications.
How long does radiant barrier last? Quality radiant barrier products last 20 years or more. The aluminum foil does not degrade significantly over time as long as it is not physically damaged.
Stay Cool and Save Money
Radiant barrier insulation is one of the smartest energy upgrades you can make for your home. It is affordable, effective, and works alongside your existing insulation to keep your attic cooler and your living space more comfortable all year long.
At BCP Inc., we offer professional grade radiant barrier products that reflect up to 97% of radiant heat. Whether you are a homeowner looking to lower your energy bills or a contractor offering energy efficiency upgrades, we have the right product for the job.
Ready to get started? Call us at 877-540-5678 or visit bcpinc.us/radiant-barrier to explore our full radiant barrier lineup and request a quote.
