How to Install House Wrap the Right Way | Guide
How to Install House Wrap the Right Way: A Step by Step Guide
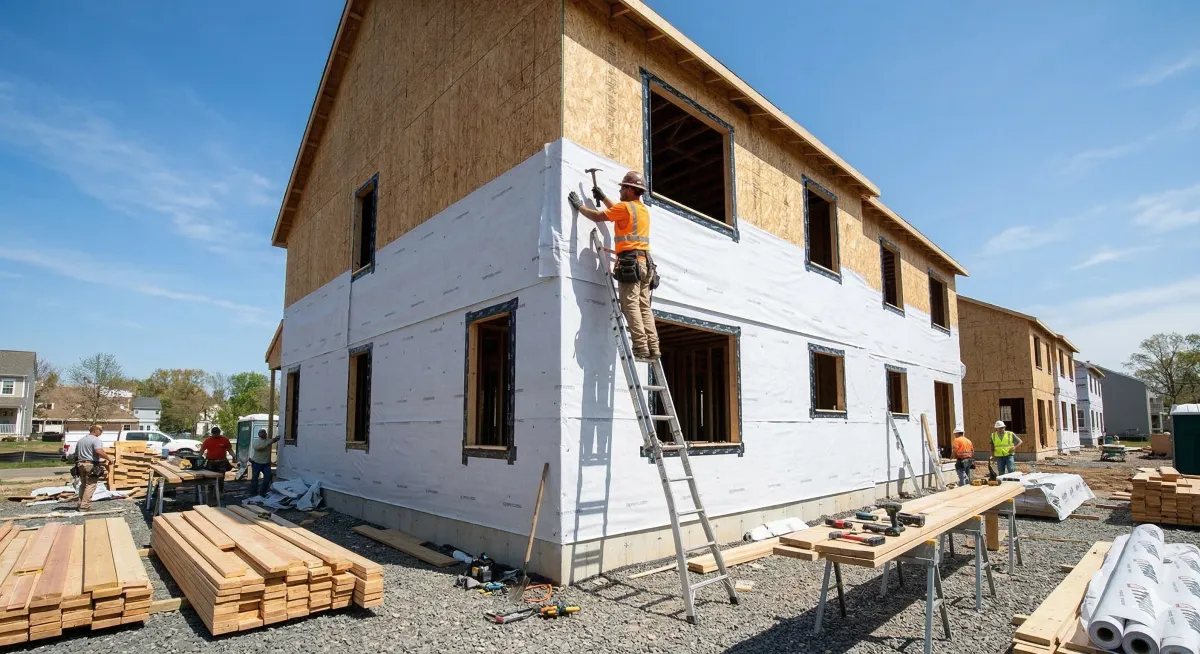
House wrap is one of those building materials that works perfectly when installed correctly and causes serious problems when it is not. A single missed overlap, a bad tape job around a window, or a fabric that is installed upside down can let water behind your siding and into your wall cavity where it has no business being.
The good news is that installing house wrap is not complicated. It just requires attention to detail and an understanding of how water moves on a wall. If you follow the right steps, the wrap will protect your home from moisture and air leaks for the life of the building.
This guide walks through the full installation process from start to finish, including the tools you need, proper overlap technique, window and door flashing, and the most common mistakes that lead to failures.
Before You Start: What You Need
Materials: House wrap (enough to cover all exterior walls plus 10% extra for overlaps and waste), manufacturer approved seam tape, flashing tape for windows and doors, cap nails or cap staples (not regular staples).
Tools: Hammer tacker or staple gun with cap staples, utility knife, tape measure, chalk line, and a ladder or scaffolding for upper floors.
Important note on fasteners: Regular staples punch small holes through the wrap that can let water in over time. Cap nails or cap staples have a plastic disc that spreads the holding force over a larger area and seals around the fastener point. Always use capped fasteners for house wrap.

Step by Step Installation
Step 1: Prepare the Wall Surface
Make sure the wall sheathing (plywood or OSB) is clean, dry, and free of protruding nails or debris. Replace any damaged sheathing before you start. House wrap needs a smooth, solid surface to lay flat and seal properly.
Step 2: Start at the Bottom Corner
Begin at the lowest point of the wall, at a corner of the building. Roll out the house wrap horizontally along the bottom of the wall. The wrap should extend at least 1 inch below the bottom of the sheathing so it overlaps the foundation sill plate. This directs any water that reaches the bottom of the wrap away from the framing.
Leave about 6 to 12 inches of extra material at the starting corner so you can wrap it around to the adjacent wall.
Step 3: Fasten as You Go
Use cap nails or cap staples to secure the wrap to the sheathing every 12 to 18 inches along the studs. Do not over drive the fasteners. You want the wrap held snug against the sheathing without tearing through the fabric.
Keep the wrap smooth and wrinkle free as you work across the wall. Wrinkles create channels where water can pool and find its way behind the barrier.
Step 4: Overlap the Rows
When you reach the point where you need to start a second row above the first, the upper row must overlap the lower row by at least 6 inches. This is the most important rule in house wrap installation. Water flows downward, so the upper layer always goes over the lower layer, just like shingles on a roof.
If you reverse the overlap (lower piece on top), water will run behind the seam and into the wall.
On vertical seams where two pieces meet side by side, overlap by at least 6 to 12 inches. Try to place vertical seams over a stud so you can fasten both layers securely.
Step 5: Tape All Seams
Run seam tape over every horizontal and vertical overlap. Use the tape recommended by the house wrap manufacturer. Not all tapes work with all wraps. Using the wrong tape can result in poor adhesion that fails within a year.
Press the tape firmly and run your hand or a roller along the full length to make sure there are no bubbles or lifted edges. A sealed seam is a waterproof seam. An unsealed seam is a leak waiting to happen.
Step 6: Wrap the Corners
At building corners, wrap the house wrap around the corner and onto the adjacent wall by at least 12 inches. This creates a continuous barrier with no exposed seams at the corner where wind driven rain is most likely to hit.
Step 7: Cut the Window and Door Openings
Do not cut the openings until the wrap is fully installed over them. Once the wrap is up, use a utility knife to cut an "I" shaped slit in the wrap over each window or door opening. Cut along the top, then make a vertical cut down the center.
Fold the top flap up and over the header. Fold the side flaps into the rough opening and staple them to the inside face of the framing. Cut the bottom flap and tuck it into the opening at the sill.
This method keeps the wrap integrated with the opening so water is always directed away from the framing.

How to Flash Windows and Doors
Window and door openings are where most house wrap failures happen. Proper flashing is critical.
Step 1: Apply sill flashing. Place a strip of flashing tape along the bottom of the rough opening (the sill), extending at least 6 inches up each side. This is the first layer and the most important because it catches any water that makes it into the opening.
Step 2: Flash the sides (jambs). Apply flashing tape vertically along each side of the opening, overlapping the sill tape at the bottom corners. The side tape should extend a few inches above the top of the opening.
Step 3: Flash the head. Apply flashing tape across the top of the opening, overlapping the side tape at both upper corners. Then fold the house wrap flap that you tucked up earlier back down over the head tape.
Step 4: Tape the wrap to the head flashing. Apply a final piece of seam tape where the house wrap meets the top of the head flashing to seal the transition.
The order matters. Every layer above overlaps the layer below. This creates a shingle effect that directs water down and out at every transition point.

House Wrap and Different Siding Types
House wrap works under virtually all exterior cladding, but some siding types have specific considerations.
Vinyl siding is the most common pairing with house wrap. Vinyl is not a waterproof barrier on its own. Water gets behind it through joints, nail holes, and at J channels around windows. House wrap catches all of that water and redirects it downward before it reaches the sheathing.
Fiber cement siding (like HardiePlank) also requires house wrap underneath. Because fiber cement is installed with tight joints and sealed fasteners, the house wrap primarily serves as an air barrier and backup moisture layer.
Wood siding and composite siding work well over house wrap. With wood siding, make sure the wrap has a high enough perm rating to let moisture vapor escape from behind the wood, especially in humid climates.
Stucco and stone veneer may require a drainage mat or rain screen between the house wrap and the cladding to create an air gap. This gap allows water to drain freely and prevents the heavy cladding from trapping moisture against the wrap. Check local codes and the siding manufacturer's requirements.
Common House Wrap Installation Mistakes
Reversed overlap. If the bottom piece laps over the top piece at a horizontal seam, water flows behind the wrap instead of over it. Always work from the bottom up with upper rows overlapping lower rows.
Skipping seam tape. Untaped seams are open doors for wind driven rain. Tape every single seam, even the ones that look tight.
Using regular staples instead of cap fasteners. Bare staple holes accumulate water over time. Cap nails and cap staples seal much better and hold the wrap more securely in wind.
Leaving the wrap exposed too long. Most house wraps are rated for 30 to 90 days of UV exposure. If your siding crew is delayed, check the product specs to make sure the wrap has not exceeded its exposure limit. BCP WrapSecure offers strong UV resistance for extended construction timelines.
Poor window flashing. This is the number one source of wall leaks in new construction. If the flashing order is wrong, water gets trapped inside the opening and rots the framing. Follow the sill, jambs, head sequence every time.
Installing the wrap over wet sheathing. If the sheathing is wet from rain, let it dry before applying the wrap. Trapping moisture between the sheathing and the wrap creates the exact problem you are trying to prevent.
Frequently Asked Questions
Which side of the house wrap faces out? The printed side faces out. The printing usually includes the manufacturer name and installation instructions. If you install it backwards, the moisture management properties may not work correctly.
How much house wrap do I need? Measure the total square footage of your exterior walls and add 10% for overlaps, corners, and waste. A standard roll of BCP WrapSecure covers 1,350 square feet (9 ft x 150 ft).
Can house wrap be installed in the rain? It is best to install on a dry day, but the wrap itself can get wet. The bigger concern is making sure the sheathing is dry before you cover it. Wet sheathing under house wrap leads to mold and rot.
Do I need house wrap if I have foam insulation on the exterior? In most cases, yes. Foam board insulation is not a code approved weather resistant barrier on its own in many jurisdictions. House wrap typically goes between the sheathing and the foam board, though some assemblies place it over the foam. Check your local code and the insulation manufacturer's guidelines.
Wrap It Right the First Time
House wrap installation is a one shot deal. Once the siding goes on, you are not getting back to the wrap without tearing the whole wall apart. Taking the time to do it right during construction saves you from hidden water damage, mold, and expensive repairs down the road.
At BCP Inc., our WrapSecure house wrap is built for clean installation and lasting performance. It lays flat, resists tearing, and works with standard seam tapes and flashing systems. Whether you are wrapping a single family home or a multi unit build, WrapSecure makes the job easier and the result more reliable.
Ready to order? Call us at 877-540-5678 or visit bcpinc.us to learn more about WrapSecure and request pricing.
