What Is Drip Edge & How to Install It | Roofing Guide
What Is Drip Edge and How to Install It: A Complete Roofing Guide
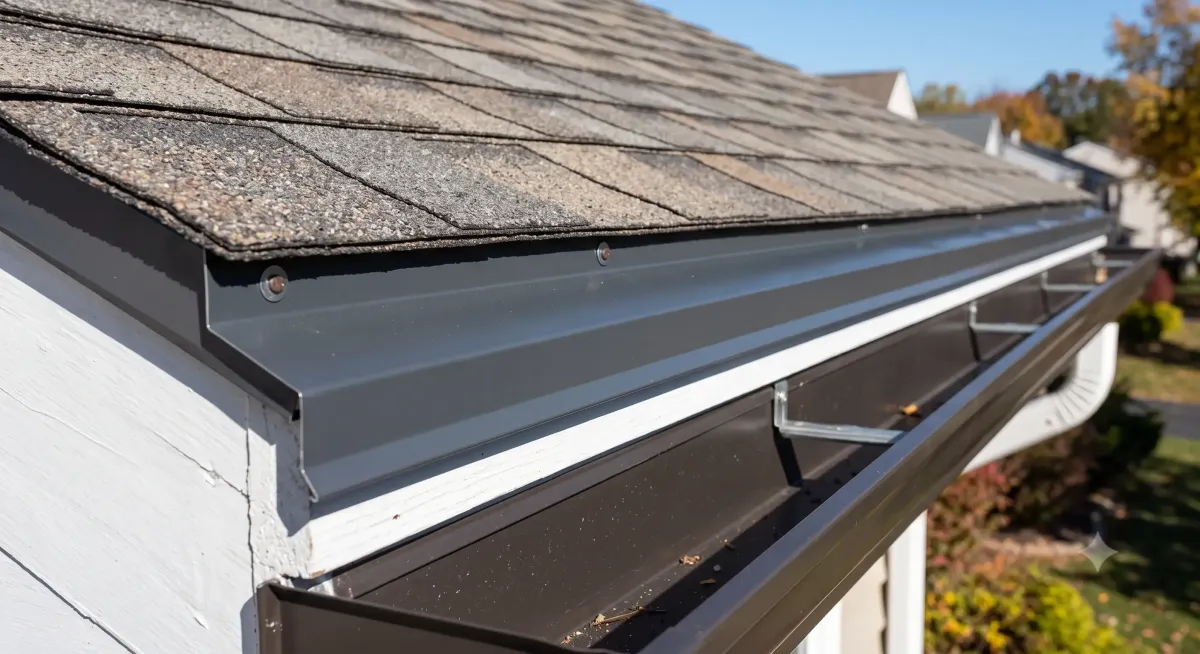
Drip edge is a thin metal flashing installed along the edges of your roof that directs rainwater away from the fascia and into the gutter, instead of letting it run back under the roofing and rot the wood beneath. It goes on in a specific order relative to your underlayment, under the underlayment along the eaves, and over the underlayment along the rakes, and in most places today it is required by building code. A roll of roofing felt or a fancy shingle will not save a roof edge that has no drip edge; the water just wicks back into the deck.
That is the whole idea in one paragraph. Below we cover what drip edge actually does, the types, the correct installation order (this is where people get it wrong), and how it works with your underlayment and ice and water shield.
What drip edge does and why it matters
The edge of a roof is its most vulnerable point. Without anything there, water running off the shingles can curl back under the roof edge by surface tension and soak into the fascia board, the roof deck, and the framing behind it. Over time that means rotted wood, peeling paint, and water stains inside the house.
Drip edge solves this with a simple piece of bent metal. It has a small outward kick at the bottom that throws water clear of the fascia and into the gutter. It is one of the cheapest parts of a roof and one of the most important. Skipping it to save a few dollars is how an edge fails years before the rest of the roof does.
Drip edge also works hand in hand with your underlayment and ice and water shield. If you want the full picture on the waterproofing layers underneath, our ice and water shield roofing guide covers the membrane that goes along with it, and our roof underlayment guide explains the layer it sits with.
Types of drip edge
Drip edge comes in a few profiles, named by the shape of the bent metal. The three you will run into most:
Type C drip edge. An L-shaped profile with a bend and a lower flange. The classic, simplest type.
Type D drip edge. A T-shaped profile, sometimes called a T-style. It has a flange at the bottom that kicks water further out, which is why many codes prefer it.
Type F drip edge. A longer leading edge, often called gutter apron or "F-style." Used over existing shingles and along gutters because of its extended top flange.
It also comes in different materials, aluminum (most common, rust proof), galvanized steel (stronger, for larger projects), and copper (premium, for high-end work). Aluminum handles almost all residential jobs well.

Tools and materials you will need
Drip edge in the profile your job needs
Roofing nails (galvanized or the type that matches your drip edge metal)
Tin snips for cutting
A hammer or roofing nailer
A chalk line
A tape measure
Your underlayment and, where used, ice and water shield
How to install drip edge: the correct order
This is the part that trips people up, because drip edge goes in a different order at the eaves than at the rakes. Get this right and everything sheds water properly.
Step 1: Install drip edge along the eaves first, UNDER the underlayment
At the eaves (the lower, horizontal edges where the gutter is), the drip edge goes on first, directly on the roof deck, before the underlayment. Then the underlayment, or ice and water shield, lays over the top of the drip edge.
Why this order: along the eaves, you want water that gets onto the underlayment to run down and over the drip edge into the gutter. If the underlayment went under the eave drip edge, water could get trapped behind it. Underlayment over eave drip edge, water sheds out.
Step 2: Install ice and water shield over the eave drip edge
In cold climates, ice and water shield goes along the eaves over the drip edge to protect against ice dams. It bonds to the deck and laps over the eave drip edge so any water from a backed-up ice dam still drains outward. This is the "does ice and water shield go over drip edge?" question, and at the eaves, yes, it laps over.
Step 3: Install drip edge along the rakes LAST, OVER the underlayment
At the rakes (the sloped edges running up the gable ends), the order flips. Here the underlayment goes down first, and the rake drip edge goes on top of the underlayment.
Why the flip: on the rakes, water runs down the slope along the edge, so you want the drip edge on top so water stays on top of it and runs off, rather than getting channeled under it.
The simple rule: eaves, drip edge under the underlayment. Rakes, drip edge over the underlayment.
Step 4: Overlap and fasten
Nail the drip edge along its top flange every 12 to 16 inches. Where two pieces meet, overlap them by about 2 to 3 inches so there is no open joint. At corners, cut and bend the metal so it wraps the corner cleanly with no gap.
Drip edge installation order at a glance

Common drip edge mistakes
Is drip edge required by code?
In most areas, yes. The widely adopted International Residential Code has required drip edge at eaves and rakes on asphalt shingle roofs since the 2012 edition. Even where it is not strictly enforced, most shingle manufacturers require it to keep the warranty valid, and any quality roofer installs it as standard. The short answer: treat it as required, because skipping it risks both a failed inspection and a voided warranty.
Putting it together with your roof system
Drip edge is one piece of the roof edge system. It works with the underlayment, the ice and water shield in cold climates, and the gutters to move water off the roof cleanly. Each layer overlaps the next so water always runs down and out, never back into the structure.
If you are building out the full roofing system, BCP supplies the underlayment and ice and water shield that go right alongside your drip edge. Call us at 877-540-5678 to spec the right products for your roof, or browse our roof underlayment options to get started.
Frequently asked questions
Does drip edge go on before or after underlayment? It depends on the edge. At the eaves (bottom edge), drip edge goes on first, under the underlayment. At the rakes (sloped edges), the underlayment goes first and the drip edge goes over it.
Does ice and water shield go over drip edge? At the eaves, yes. The eave drip edge goes down first, then the ice and water shield laps over it so any backed-up water still drains outward over the metal.
Is drip edge required by code? In most areas yes, the International Residential Code has required it at eaves and rakes for asphalt shingle roofs since 2012. Many shingle warranties also require it.
What is the difference between Type C, D, and F drip edge? Type C is a simple L-shape, Type D is a T-shape with a longer bottom kick that throws water further out, and Type F has an extended top flange used as a gutter apron or over existing shingles.
What material is best for drip edge? Aluminum handles most residential roofs and will not rust. Galvanized steel is stronger for larger jobs, and copper is a premium choice for high-end roofs.
How far apart do you nail drip edge? Nail along the top flange every 12 to 16 inches, and overlap adjoining pieces by 2 to 3 inches so there are no open joints.
